Imagine a warm summer evening, the scent of freshly baked goods wafting through the air. Your kitchen is about to become the heart of unforgettable memories, all thanks to a classic dessert that never goes out of style: the mixed berry cobbler. This beloved treat is more than just a dessert—it’s a tradition, a comfort, and a celebration of flavor.
Today, you’ll discover how to create the best mixed berry cobbler from scratch, a recipe that masterfully balances the vibrant, juicy sweetness of mixed berries with the golden, buttery charm of a biscuit topping. Perfect for summer gatherings, BBQs, or those special family moments, this cobbler is a crowd-pleaser that’s as easy to make as it is delicious.
Unlike traditional pie recipes, this cobbler simplifies the process by focusing on a no-fuss, homestyle approach. Whether you’re a seasoned baker or just starting out, this recipe guides you through every step—from selecting the freshest ingredients to expert baking tips—ensuring your cobbler turns out perfectly every time.
So, let’s dive into the art of crafting a dessert that’s sure to become a family favorite. Your journey to the perfect mixed berry cobbler starts here.
Key Takeaways
- Master the perfect balance of juicy berries and buttery biscuit topping.
- Ideal dessert for summer gatherings, BBQs, and family occasions.
- Simplified recipe that skips complicated pie crust techniques.
- Detailed guide covering ingredient selection, preparation, and baking tips.
- Suitable for both experienced bakers and beginners.
Introduction: Why You Should Try a Mixed Berry Cobbler
Imagine the warmth of a summer afternoon, the sweetness of fresh berries filling the air. Your kitchen is about to become the heart of unforgettable memories, all thanks to a classic dessert that never goes out of style: the mixed berry cobbler. This beloved treat is more than just a dessert—it’s a tradition, a comfort, and a celebration of flavor.
Today, you’ll discover how to create the best mixed berry cobbler from scratch, a recipe that masterfully balances the vibrant, juicy sweetness of mixed berries with the golden, buttery charm of a biscuit topping. Perfect for summer gatherings, BBQs, or those special family moments, this cobbler is a crowd-pleaser that’s as easy to make as it is delicious.
Unlike traditional pie recipes, this cobbler simplifies the process by focusing on a no-fuss, homestyle approach. Whether you’re a seasoned baker or just starting out, this recipe guides you through every step—from selecting the freshest ingredients to expert baking tips—ensuring your cobbler turns out perfectly every time.
So, let’s dive into the art of crafting a dessert that’s sure to become a family favorite. Your journey to the perfect mixed berry cobbler starts here.
Essential Ingredients for a Standout Mixed Berry Cobbler
Creating a memorable dessert begins with selecting the right ingredients. The perfect blend of flavors and textures relies on a few key components that elevate your dish from ordinary to extraordinary.
Fresh vs. Frozen Berries
Fresh berries bring vibrant flavor and texture, but frozen berries are a great alternative. They retain much of their flavor and are convenient, especially when fresh berries aren’t in season.
Baking Essentials and Ingredient Substitutes
Your pantry likely holds most of the essentials: flour, sugar, butter, and buttermilk. These basics create a rich, buttery crust. For substitutions, you can make buttermilk by mixing milk with vinegar or lemon juice.
| Ingredient | Measurement | Substitute |
|---|---|---|
| Flour | 2 cups | All-purpose flour |
| Sugar | 1 cup | Brown sugar |
| Butter | 1/2 cup | Coconut oil |
| Buttermilk | 1 cup | Milk with vinegar |

Quality ingredients are crucial for the best results. Each component plays a role in the final texture and flavor, ensuring your dessert is both delicious and visually appealing.
Mastering the Mixed Berry Cobbler: Step-by-Step Preparation
Now that you’ve gathered your ingredients, it’s time to bring everything together. This step-by-step guide will walk you through creating a delicious dessert that’s sure to impress.
Creating the Berry Filling with Care
In a large bowl, gently mix your berries with sugar, a squeeze of lemon juice, and a sprinkle of cornstarch. This mixture ensures your filling is perfectly balanced—not too runny, not too thick. Let it sit for about 10 minutes to allow the flavors to meld together naturally.
Crafting the Biscuit or Streusel Topping
In another bowl, combine flour, sugar, and a pinch of baking powder. Cut in cold butter until the mixture resembles coarse crumbs. Add buttermilk, stirring just until combined. Keep ingredients cold to prevent the topping from melting into the berries during baking.
Assembling and Baking Your Dessert
Preheat your oven to 375°F. Pour the berry mixture into a baking dish and evenly spread the topping over it. Bake for 40-50 minutes, until the topping is golden and the filling bubbles. Let it cool slightly before serving.

Baking Tips and Techniques for a Flawless Finish
The final steps in baking your dessert are where the magic truly happens. With a few simple techniques, you can ensure your dessert comes out perfectly every time.
Avoid Overmixing the Dough for a Light Texture
One of the most critical steps in achieving a light, airy texture is to avoid overmixing the dough. Overmixing can create a dense, tough topping that no one will enjoy. Stop mixing as soon as the ingredients come together in a cohesive mass. This gentle handling ensures the dough remains tender and flaky.
Achieving an Irresistible Golden Brown Crust
A golden brown crust is the hallmark of a perfectly baked dessert. To achieve this, preheat your oven to the correct temperature and ensure it’s fully heated before placing your dessert inside. Brushing the top with a little buttermilk and sprinkling coarse sugar will give it that extra crispy, golden exterior everyone loves.
When checking for doneness, insert a toothpick into the center. If it comes out clean, your dessert is ready. Allow it to cool for a few minutes before serving—just about a minute or two is enough. Unlike a traditional pie, this dessert doesn’t need a long cooling time, making it a quick treat for any occasion.
For an extra touch, try adding a light scoop of powdered sugar or a drizzle of a sweet glaze over the top. These small details can make a big difference in both texture and appearance.
Flavor Variations and Customizations to Make It Your Own
One of the joys of this recipe is its versatility. You can easily experiment with different fruits and berries to create a unique dessert each time. Whether you prefer the sweetness of blueberries, the tartness of blackberries, or the warmth of peaches, the possibilities are endless.
A great advantage of this recipe is the ability to use frozen berries without thawing them. This not only saves time but also retains the flavor and texture of the berries. Simply add them directly to the mixture for a delicious and convenient option.
Consider adding creative twists to elevate your dessert. A hint of cinnamon or a sprinkle of lemon zest can bring out the natural flavors of the fruit. For a blueberry and blackberry combination, try adding a pinch of cinnamon for a warm, aromatic flavor.
| Fruit Combination | Topping Adjustment | Optional Add-ins |
|---|---|---|
| Blueberry and Blackberry | Light dusting of cinnamon | Cinnamon or nutmeg |
| Peach and Blueberry | Crumbly streusel | Lemon zest |
| Blackberry and Peach | Buttery crust | Ginger |
Don’t be afraid to make mixed berry combinations. Blueberries, blackberries, and even peaches can be mixed to create a medley of flavors. Adjust the topping to complement your fruit choice—whether it’s a crumbly streusel or a buttery crust, the texture will enhance the overall experience.
“The true art of baking lies in experimentation. Every substitution, every addition, is an opportunity to create something truly personal.” — Jane Smith, Culinary Expert
Empower your creativity by taking the basic recipe and adding your personal touch. Whether it’s a drizzle of honey, a sprinkle of oats, or a pinch of spice, each variation will ensure your dessert remains top-quality and uniquely yours.
Serving Suggestions to Elevate Your Dessert Experience
The moment your dessert comes out of the oven is when the real magic begins. Serving it while warm enhances the experience, making every bite a delight. Pairing it with the right accompaniments can elevate it from a simple dessert to a memorable treat.
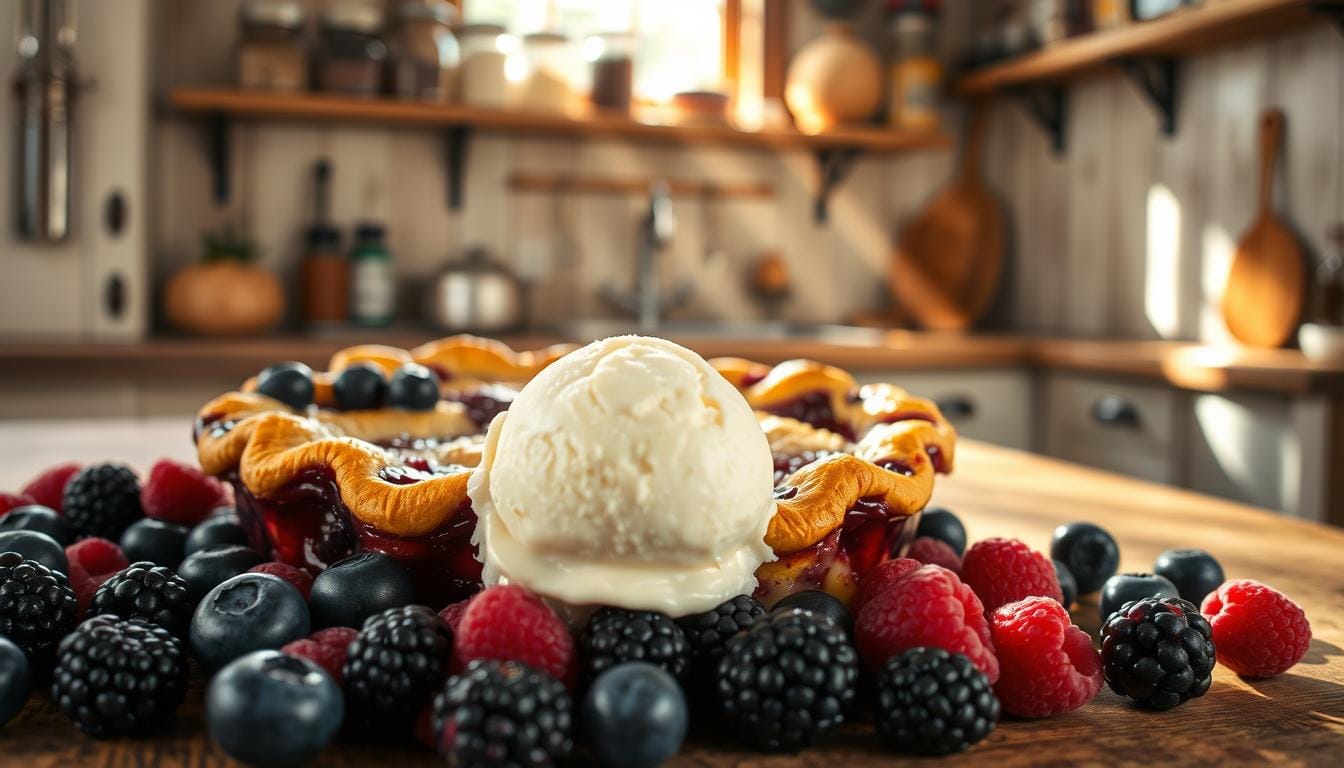
Pairing with Vanilla Ice Cream or Whipped Cream
A scoop of vanilla ice cream or a dollop of lightly sweetened whipped cream adds a creamy contrast to the warm, fruity dessert. The coldness of the cream balances the sweetness, creating a delightful harmony of flavors and textures.
Garnishing with fresh fruit, such as sliced strawberries, adds both visual appeal and a burst of freshness. A simple sprinkle of fresh berries can make your dessert look stunning on the plate.
| Serving Vessel | Description | Presentation Tip |
|---|---|---|
| Rustic Bowl | Earthy and charming | Highlights layers and texture |
| Modern Dessert Dish | Sleek and contemporary | Shows off the vibrant colors |
| Small Mason Jar | Quaint and portion-friendly | Perfect for individual servings |
Adding a pinch of salt can balance the sweetness, enhancing the overall flavor profile. This small touch can elevate the dessert to a new level.
“The art of serving dessert lies not just in the taste, but in the details that make it unforgettable.” — Culinary Expert
Don’t be afraid to get creative with your presentation. Whether it’s a sprinkle of powdered sugar or a drizzle of caramel, every detail makes a difference. Make every bite a treat for both the eyes and the palate.
Conclusion
With these simple steps, you’re ready to create a dessert that’s as delicious as it is memorable. This cobbler recipe stands out for its ease and adaptability, allowing you to craft a treat that suits your taste preferences. From selecting fresh ingredients to achieving the perfect golden topping, every step ensures a delightful outcome.
The key to success lies in using the right baking dish and precise measurements, even down to the teaspoon. Balancing flavors, especially the fat content in the butter, creates a rich yet light texture. This attention to detail makes your berry cobbler truly special.
Don’t hesitate to experiment with different fruits and spices to make the recipe your own. Share your creations and enjoy the joy of baking a traditional yet innovative dessert. Your kitchen is about to become the heart of unforgettable memories—one delicious berry cobbler at a time.
FAQ
Can I use frozen berries instead of fresh ones for the cobbler?
What if I don’t have baking powder? Can I make the cobbler without it?
How do I prevent the sugar in the filling from making the cobbler too sweet?
Can I prepare the cobbler ahead of time and bake it later?
Why did my cobbler topping not turn golden brown?
Can I substitute all-purpose flour with another type of flour?
How do I store leftovers to keep them fresh?
Can I make the cobbler in a slow cooker instead of the oven?
What’s the best way to serve the cobbler?
Can I add other fruits like peaches to the berry mixture?
Table of Contents
Did you like this recipe?
There are no reviews yet. Be the first one to write one.