Table of Contents
Making the perfect banana bread is easier than ever
With self-raising flour, preparing this beloved baked treat has never been simpler. This versatile ingredient ensures your loaf rises beautifully, delivering a texture that’s soft and satisfying. Whether you’re a seasoned baker or trying your hand at baking for the first time, this guide will walk you through every step to achieve consistently delicious results.
Key Takeaways
- Self-Raising Flour Simplifies Baking: Pre-mixed with leavening agents, it saves time and ensures reliable outcomes.
- Perfect for Quick Breads: Its unique properties produce a light, fluffy texture ideal for recipes with moist ingredients like bananas.
- Accessible for All Skill Levels: This straightforward method suits both novice and experienced bakers.
Understanding Self-Raising Flour
Self-raising flour is a staple in many kitchens, thanks to its convenience. It contains pre-mixed baking powder and salt, removing the guesswork of measuring these components. This simplicity makes it a favorite for quick breads and cakes, where consistency is key.
In traditional baking, combining separate ingredients to achieve proper rising can be tricky. Too much or too little of a leavening agent may lead to uneven textures or flavors. Self-raising flour eliminates these challenges, ensuring your loaf rises evenly with minimal effort.
Benefits of Using Self-Raising Flour
| Benefit | Why It’s Useful |
| Built-in Leavening Agents | Removes the need for baking powder or soda, simplifying preparation. |
| Light and Airy Texture | Creates a soft, fluffy crumb that complements the natural density of bananas. |
| Time-Saving | Speeds up the process, perfect for busy schedules or last-minute baking sessions. |
| Consistency | Delivers reliable results, even for those new to baking. |
Essential Ingredients for a Delicious Loaf
A great banana loaf relies on a balance of key components, each contributing to the final flavor and texture. Here’s what you’ll need:
- Ripe Bananas: Use overripe bananas with brown spots for optimal sweetness and moisture.
- Self-Raising Flour: Provides structure and ensures an even rise.
- Eggs: Bind the mixture and help achieve a cohesive texture.
- Unsalted Butter or Oil: Adds richness and keeps the loaf tender.
- Granulated Sugar: Sweetens and enhances caramelization during baking.
- Vanilla Extract: A subtle flavor enhancer that complements the bananas.
- Salt: Enhances the flavor by countering sweetness and adding depth to the overall taste.
Optional Add-ins: For extra flair, consider incorporating nuts, chocolate chips, or spices like cinnamon or nutmeg.
Step-by-Step Method
1. Preparing the Wet Ingredients
Start by peeling and mashing your ripe bananas until smooth. A fork or potato masher works well for this task. Transfer the mashed fruit to a mixing bowl, then add eggs, melted butter, and vanilla extract. Whisk everything together until evenly combined, creating a liquid base with a luscious aroma.
2. Mixing the Dry Ingredients
In a separate bowl, sift the self-raising flour to eliminate lumps. If you’re using additional spices, mix them with the flour to ensure even distribution. Gradually incorporate the dry mixture into the wet base, folding gently to maintain the batter’s lightness.
3. The Art of Folding
Avoid overmixing, as this can develop gluten and make the loaf dense. Use a spatula to fold in a figure-eight motion, ensuring all ingredients are just combined. This technique preserves airiness, crucial for a soft and fluffy loaf.
Baking Tips for Success
Baking is part science, part art. Paying attention to the details can elevate your results from good to exceptional.

1. Temperature and Timing
Preheat your oven to 350–375°F (175–190°C) for an even bake. Most banana loaves take 45–55 minutes, but ovens vary, so keep an eye on your bread during the last 10 minutes.
2. Test for Doneness
Check the loaf by inserting a toothpick or cake tester into its center; if it comes out clean or with a few crumbs, the bread is perfectly baked.
3. Prevent Overbaking
To avoid dryness, monitor the loaf closely as it finishes baking. If the top browns too quickly, tent it with aluminum foil to protect it from overcooking.
Troubleshooting Common Issues
| Problem | Cause | Solution |
| Dense Texture | Overmixing the batter. | Fold gently and avoid overworking. |
| Dry or Crumbly Bread | Overbaking or insufficient moisture. | Add extra banana or a splash of milk. |
| Uneven Rising | Incorrect oven temperature. | Use an oven thermometer for accuracy. |
By addressing these common issues, even beginners can create a loaf that’s perfectly moist and well-risen every time.
Creative Variations and Add-ins
Making this classic treat your own is as simple as experimenting with flavors and textures. Looking for inspiration? Try these variations:
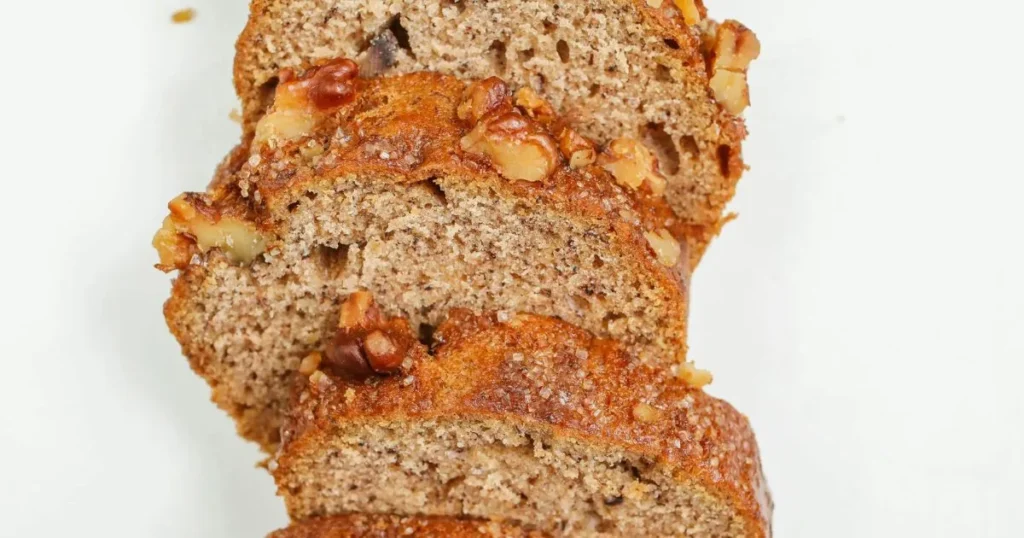
- Nutty Crunch: Incorporate chopped walnuts or pecans for added texture.
- Chocolate Lover’s Dream: Stir in chocolate chips or a swirl of melted chocolate.
- Fruity Fusion: Mix in dried cranberries or fresh blueberries for a tangy twist.
- Spiced Elegance: Sprinkle in cinnamon, nutmeg, or cardamom for a warm, aromatic touch.
Each variation offers a unique spin on the original, allowing you to tailor the recipe to your preferences.
Storing and Serving Your Loaf
| Storage Option | Duration | Tips |
| Airtight Container | 2–3 days at room temperature. | Wrap in plastic wrap to preserve moisture. |
| Freezer | Up to 3 months. | Slice before freezing for easy thawing. |
Serving Suggestions: Enjoy a slice warm with butter, drizzle it with honey, or serve with a scoop of vanilla ice cream for dessert.
Why Choose Self-Raising Flour?
Switching to self-raising flour not only simplifies the process but also enhances the quality of your baked goods. The built-in leavening agents provide the perfect lift, while the fine texture creates a smooth, tender crumb. Whether you’re baking for family, friends, or just yourself, this ingredient ensures every loaf turns out beautifully.
Frequently Asked Questions
1. Is it possible to replace self-raising flour with all-purpose flour?
Yes, but you’ll need to add baking powder and salt to mimic the properties of self-raising flour.
2. What’s the ideal ratio for add-ins?
Use 1/2 to 1 cup of add-ins like nuts or chocolate chips to avoid overwhelming the batter.
3. How do I make my loaf more moist?
Incorporate additional banana or a dollop of yogurt into the batter for added moisture.
Conclusion
Baking with self-raising flour makes preparing banana bread an enjoyable, stress-free experience. With its consistent results, time-saving properties, and ability to enhance the texture of baked goods, it’s a fantastic choice for both novice and seasoned bakers. Experiment with variations, troubleshoot common issues, and share your creations with loved ones—this classic recipe never goes out of style.
Did you like this recipe?
There are no reviews yet. Be the first one to write one.


1 thought on “How to Make Irresistibly Perfect Banana Bread with Self-Raising Flour?”
Comments are closed.